
How to Prepare For Installation Day
Tips from The Wallpaper Concierge and Hi-Country Paperworks
Wallpaper install day should feel exciting, not stressful. Whether it’s a feature wall, a powder room, or a full room, a little preparation makes the day run smoothly. These are practical prep tips based on real project experience and input from one of our top installation partners, Hi-Country Paperworks.
What Installation Day Looks Like
Installation day is when the plan turns into reality. By this point, selections, measurements, quantities, and layout notes have already been handled. With a bit of simple prep, the install itself is usually straightforward and efficient.
Wall Condition: What to Expect
Wall condition is reviewed during the consultation and any prep needs are flagged ahead of time. If a skim coat is recommended, that will already be known before installation day.
If walls are smooth and sound, they are typically ready for install.
Prep may be needed if there are:
anchor or nail holes
flaking or peeling paint
heavy texture
uneven patch areas
Unless specifically requested otherwise, installers typically handle skim coating and surface prep as part of the installation scope. That work usually does not need to be completed in advance by the client.
Skim coating or sanding creates a smooth surface so seams sit flat and the final finish looks clean and consistent.
Clear the Space
Furniture and wall decor should be removed or moved away from the install area as much as possible.
This gives the installer room to work, keeps wallpaper clean, and allows for proper ladder and table placement.
Outlet and switch plates are typically removed by the installer unless discussed otherwise.
Tip from Hi Country Paperworks: even shifting furniture a few feet off the wall can significantly improve workflow and accuracy.
Lighting Helps More Than You Think
Good lighting helps installers see seams, edges, and pattern alignment clearly.
turn on overhead lights and lamps
open shades if glare is not an issue
avoid very dim rooms if possible
Even, consistent light across the wall supports a better result.
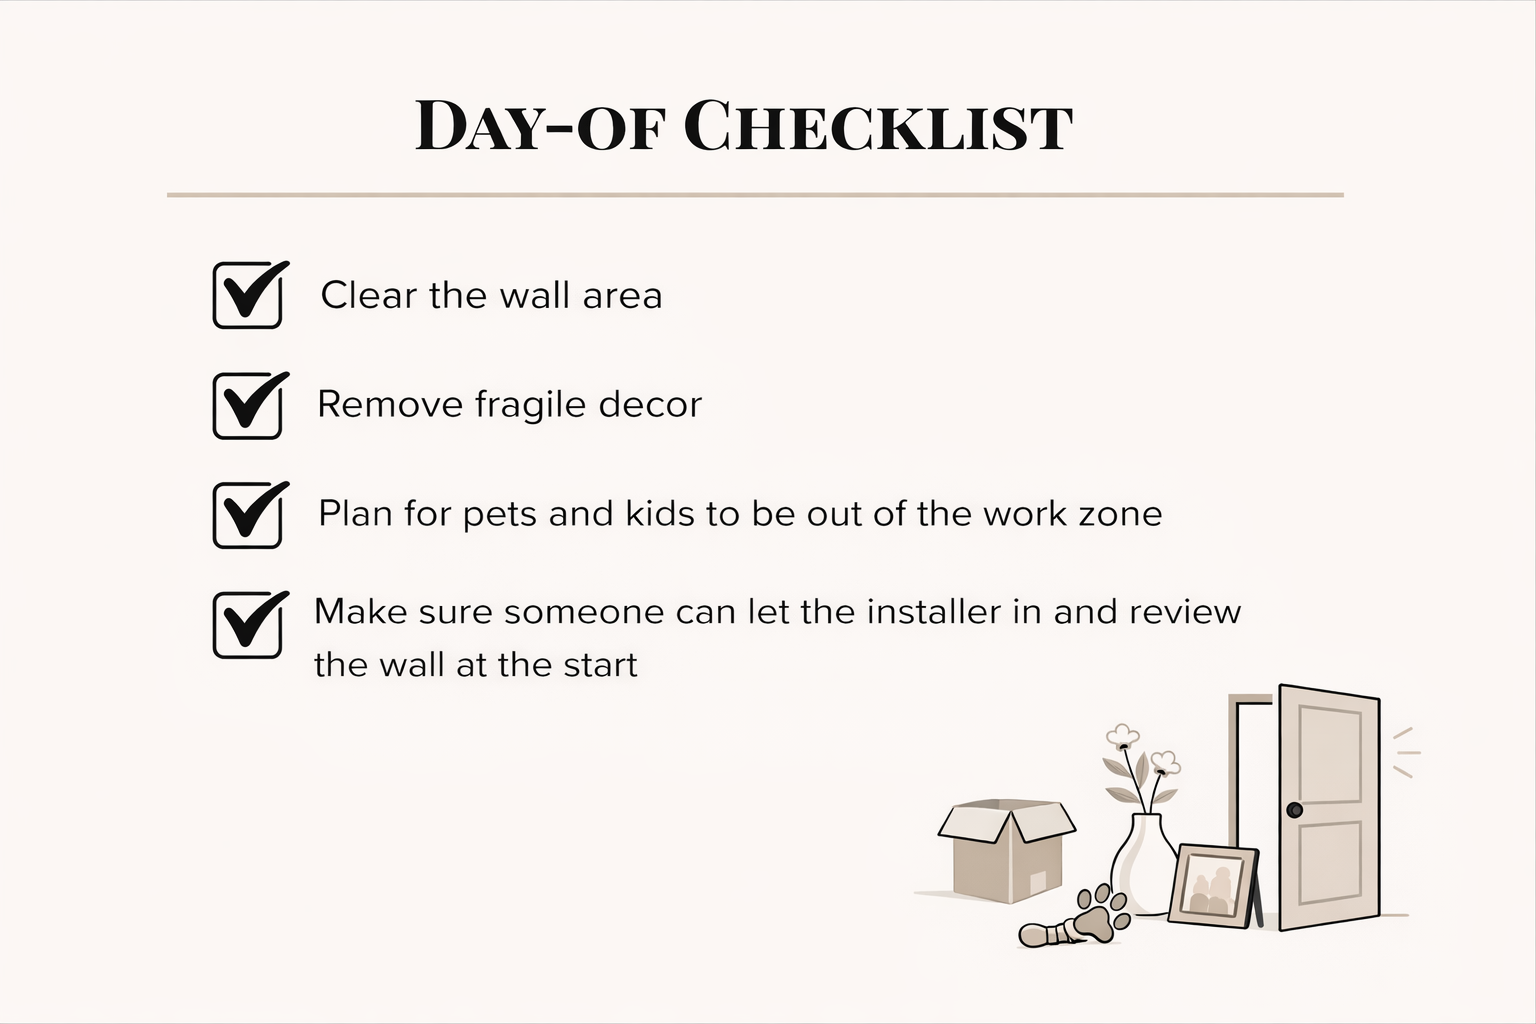
Be Present at the Start of Installation
A homeowner or decision-maker should be present when the installer arrives.
Even with measurements and layout notes already shared, a quick walkthrough at the start helps confirm wall locations and scope. This avoids confusion and last-minute changes.
It helps to confirm:
which wall or walls are being papered
any boundaries or stopping points
obstacles or areas that need special care