
How to Install Pre-Pasted Wallpaper: A DIY Guide
So, you've decided to install wallpaper yourself. First, you can absolutely do this.
If you read my guide on why I prefer pre-pasted wallpaper over peel-and-stick for DIY projects, you already know that one of my favorite things about pre-pasted wallpaper is how forgiving it can be. Once activated, you have time to move and adjust the wallpaper on the wall before the adhesive dries. That flexibility is going to be your best friend. The key is taking your time, preparing properly, and most importantly, getting that first drop perfectly straight.
Note: If you are a more visual person, there is also a helpful video from Painted Paper at the bottom of this article.
The Installation Process at a Glance
Important terms to know
Pattern repeat is the vertical distance before the design starts over again. For example, if your wallpaper has a 24-inch repeat, the same point in the pattern appears every 24 inches as you move down the roll. The larger the repeat, the more extra wallpaper you may need when cutting your drops so the design lines up correctly.
Match type tells you how the pattern on one drop lines up with the drop next to it.
Straight match: The pattern lines up at the same height on every drop.
Drop match: The pattern shifts on the next drop, often by half of the pattern repeat, before lining up again.
Random match: There is no specific pattern alignment between drops. This is the easiest one!
Booking: After the adhesive is activated, booking means gently folding the pasted sides of the wallpaper toward each other without creating hard creases. This keeps the adhesive moist and gives the wallpaper time to relax before it is installed.
Before You Start
Don't open your wallpaper and immediately start cutting.
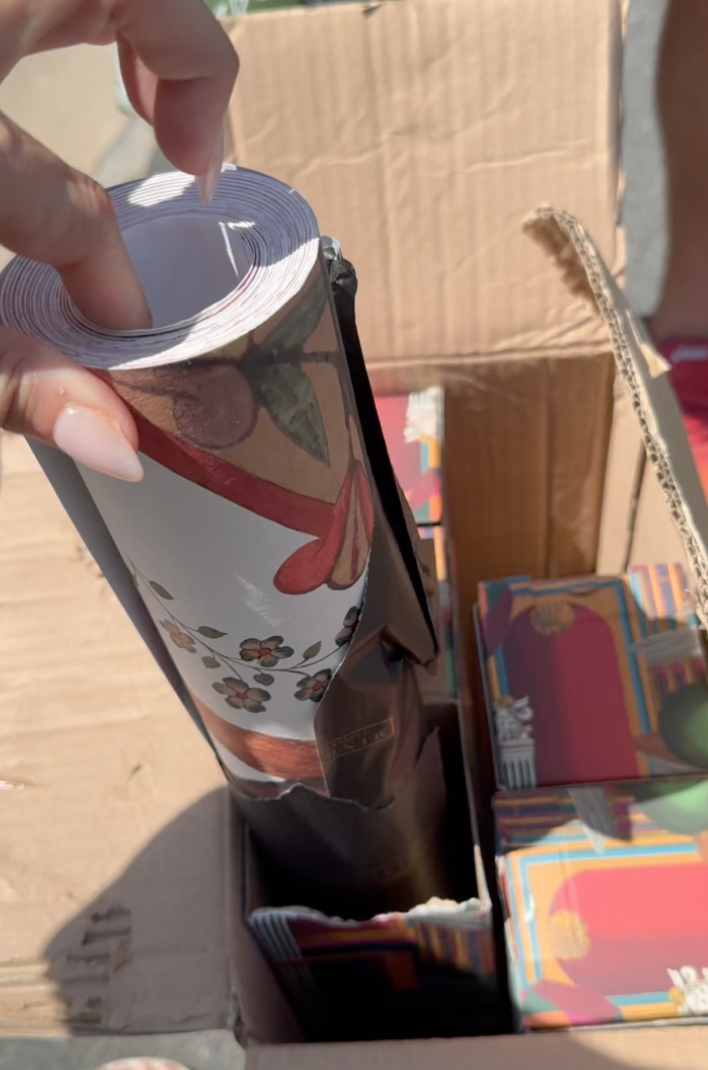
First, check that you have enough material for your project. If your wallpaper has dye lots or run numbers, make sure they match. Look over the rolls for any obvious defects. Then find the wallpaper's pattern repeat and match type.
You can usually find the repeat and match type on the wallpaper label or manufacturer's website. Don't skip this step. Understanding the pattern before you start cutting can save you from wasting a lot of wallpaper.
And before doing anything else, read the manufacturer's installation instructions.
Pre-pasted wallpapers can vary. Some are sprayed with water, some are submerged in a water tray, and activation and booking times can differ. The instructions for your specific wallpaper always win.
Step 1: Prep Your Walls
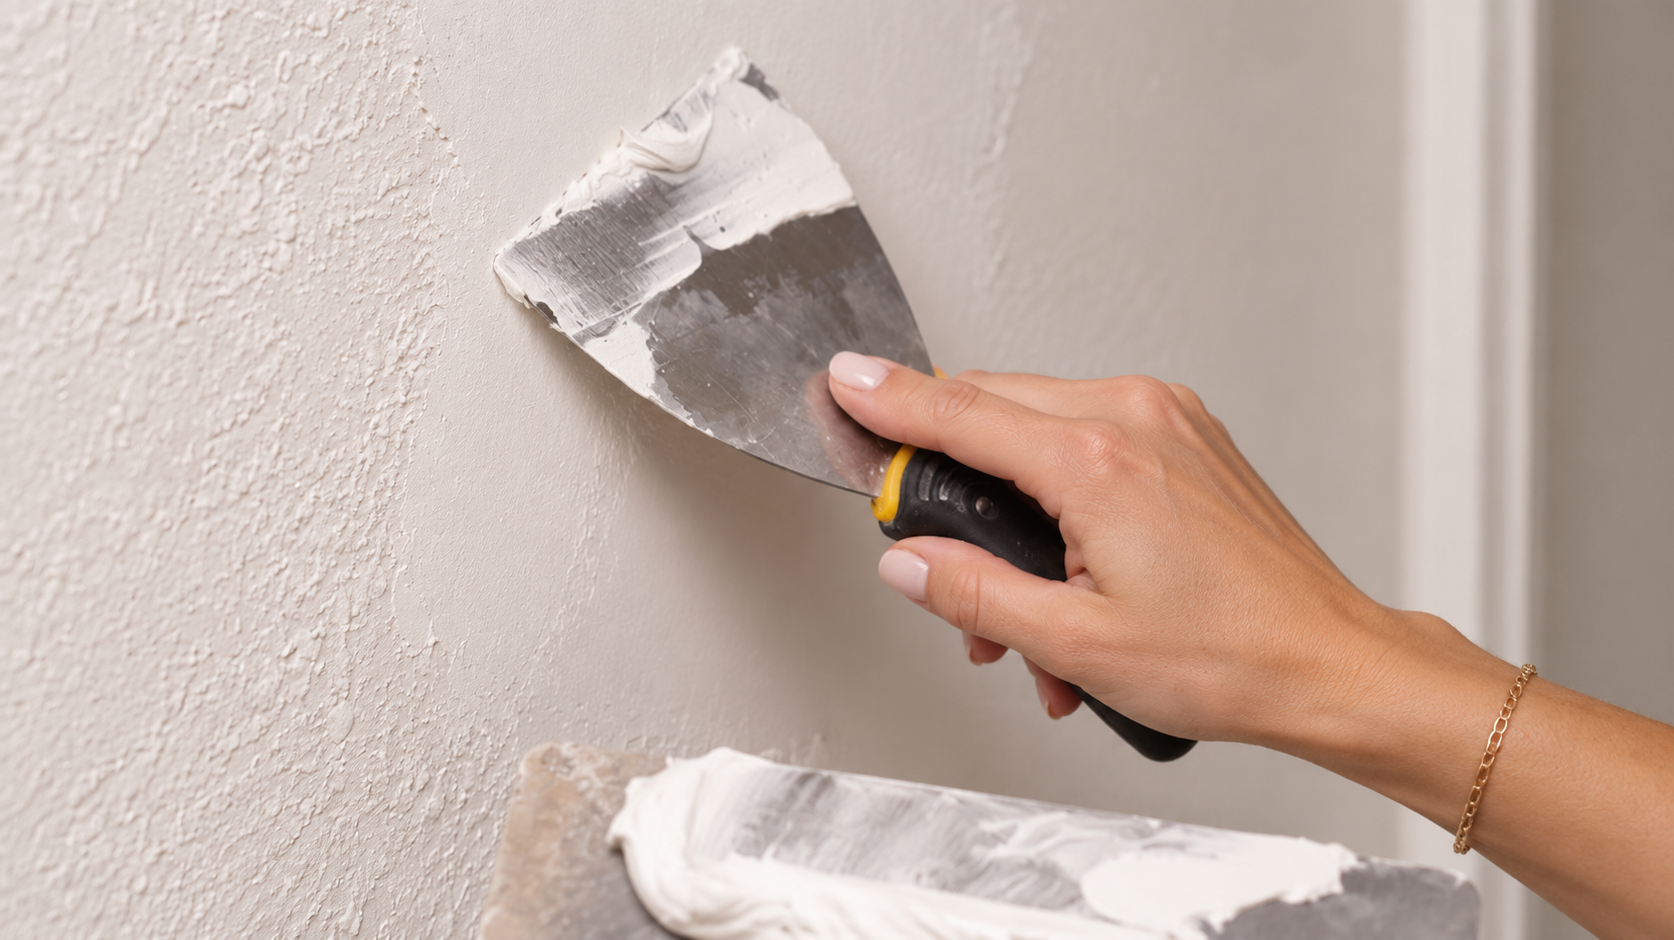
Wallpaper wants a clean, dry, smooth surface.
Repair holes, peeling paint, or major imperfections before you begin, and prime the wall when appropriate. And remember: wallpaper doesn't
hide texture. In many cases, it makes texture more noticeable. If a wall is heavily textured, you may also have trouble getting the wallpaper to make enough contact with the wall to properly adhere.
If you're unsure whether your wall is too textured, order a wallpaper sample first and test it on the actual wall.
Activate it according to the manufacturer's instructions, apply it to the wall, and see how well it adheres and how much of the texture shows through.
It's a much cheaper experiment than finding out after you've ordered several rolls.
Remove outlet and switch covers before you start, and always turn off the power at the breaker before working around electrical openings.
Step 2: Gather Your Tools
You don't need a huge collection of specialty tools.
I recommend having:
Pencil
Scissors
Long ruler or straightedge
Level or laser level
Seriously. Buy extra X-Acto blades. Wet wallpaper can tear surprisingly easily. If your blade starts pulling or dragging instead of making a clean cut, replace it. A fresh blade will give you much cleaner lines around the ceiling, baseboards, outlets, and trim.
Step 3: Establish Your Plumb Line
This may be the most important step in the entire installation.
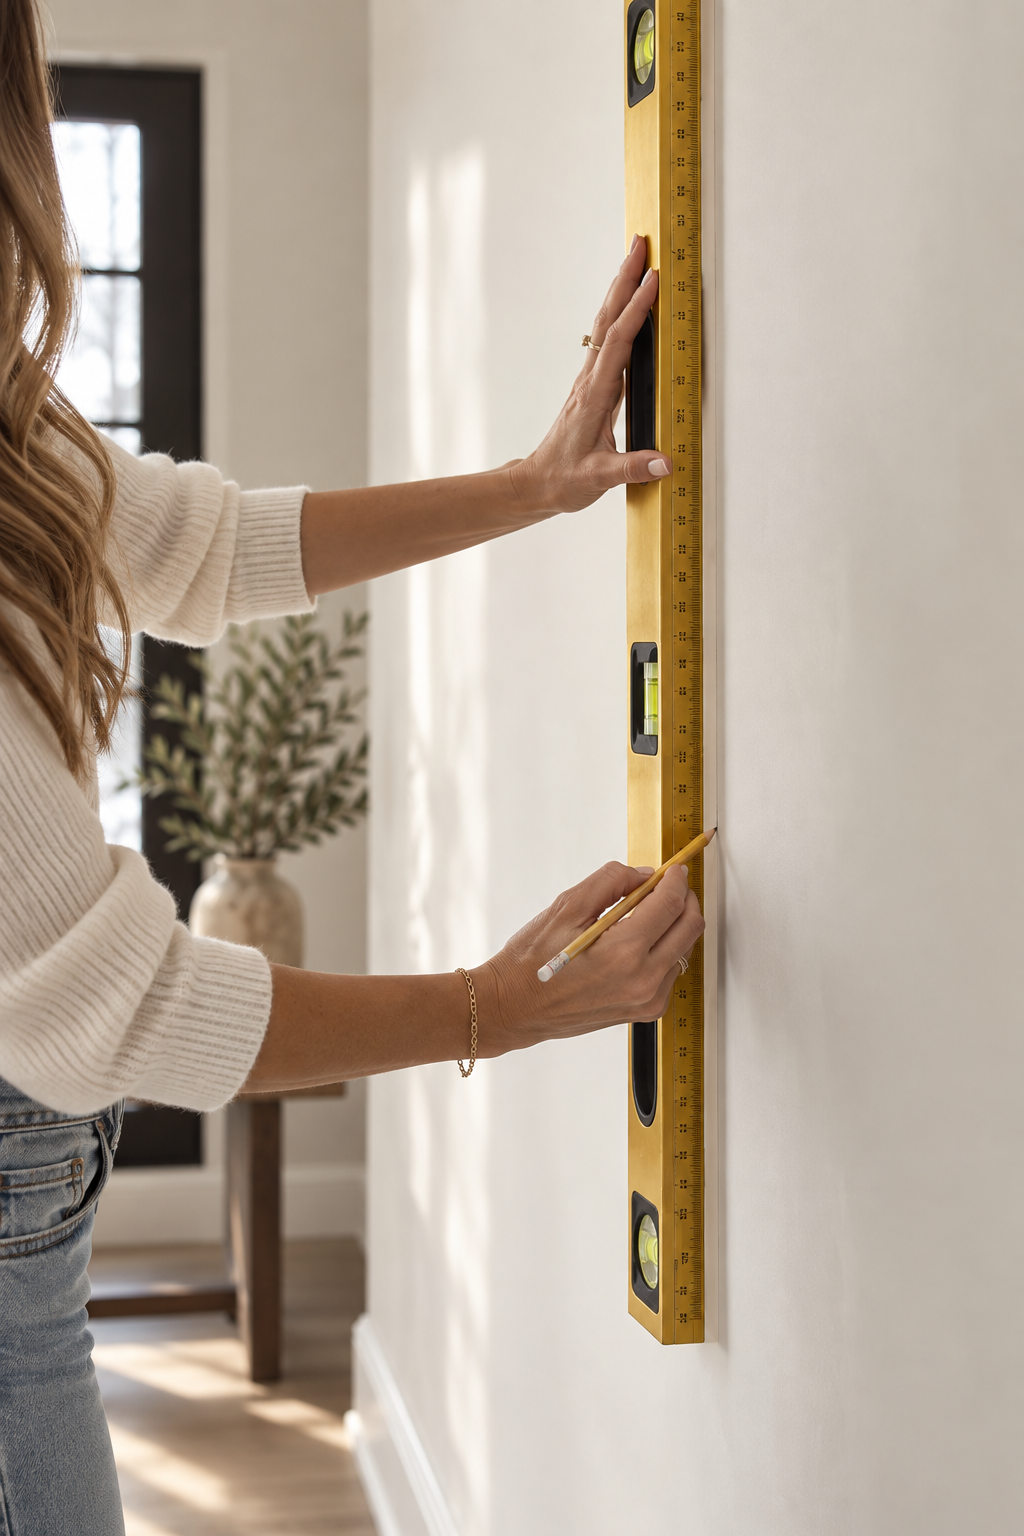
Do not assume your wall, ceiling, or corner is straight. Your first strip of wallpaper, also called your first drop, establishes the line that every other drop will follow. If the first one is slightly crooked, that mistake can become more noticeable with every drop you add. Instead of relying on your house to give you a straight line, you're going to create your own perfectly vertical reference line. This is called a plumb line.
There are a few ways to do it.
Option 1: Use a Laser Level
This is probably the easiest option.
Project a perfectly vertical line onto the wall and use that as the guide for the edge of your first drop.
Option 2: Use a Level and Pencil
A traditional level works too.
Get your level perfectly vertical and make several light pencil marks along the wall. Use a straightedge to connect those marks and create your vertical guide.
Keep the pencil line light so you don't risk it showing through the wallpaper.
Option 3: Use a Plumb Bob
You can also go old school with a plumb bob.
A plumb bob is simply a weight attached to a string. Gravity pulls the string perfectly vertical, giving you a straight reference line to mark on the wall.
Whichever method you use, take your time with this step. Your first drop is your foundation. If you get that one straight, you've made everything that comes next much easier.
To determine where the plumb line goes:
Measure the width of your wallpaper. Say the wallpaper is 27" wide.
From the corner where you plan to start, measure slightly less than one wallpaper width, around 26½" for a 27" paper.
This is where to put the vertical line.
Step 4: Measure and Cut Your First Drop
Measure from the ceiling to the baseboard.
Then add approximately four inches, giving yourself about two extra inches at the ceiling and two extra inches at the bottom.
So, if your wallpapered wall height is 96 inches, your first drop would be approximately 100 inches before accounting for the pattern repeat or where you want the design to begin.
That extra paper gives you some breathing room.
You don't want to discover halfway through installation that a slightly uneven ceiling or baseboard has left your wallpaper half an inch too short.
Step 5: Activate the Paste
Lay your first drop pattern-side down on a clean surface.
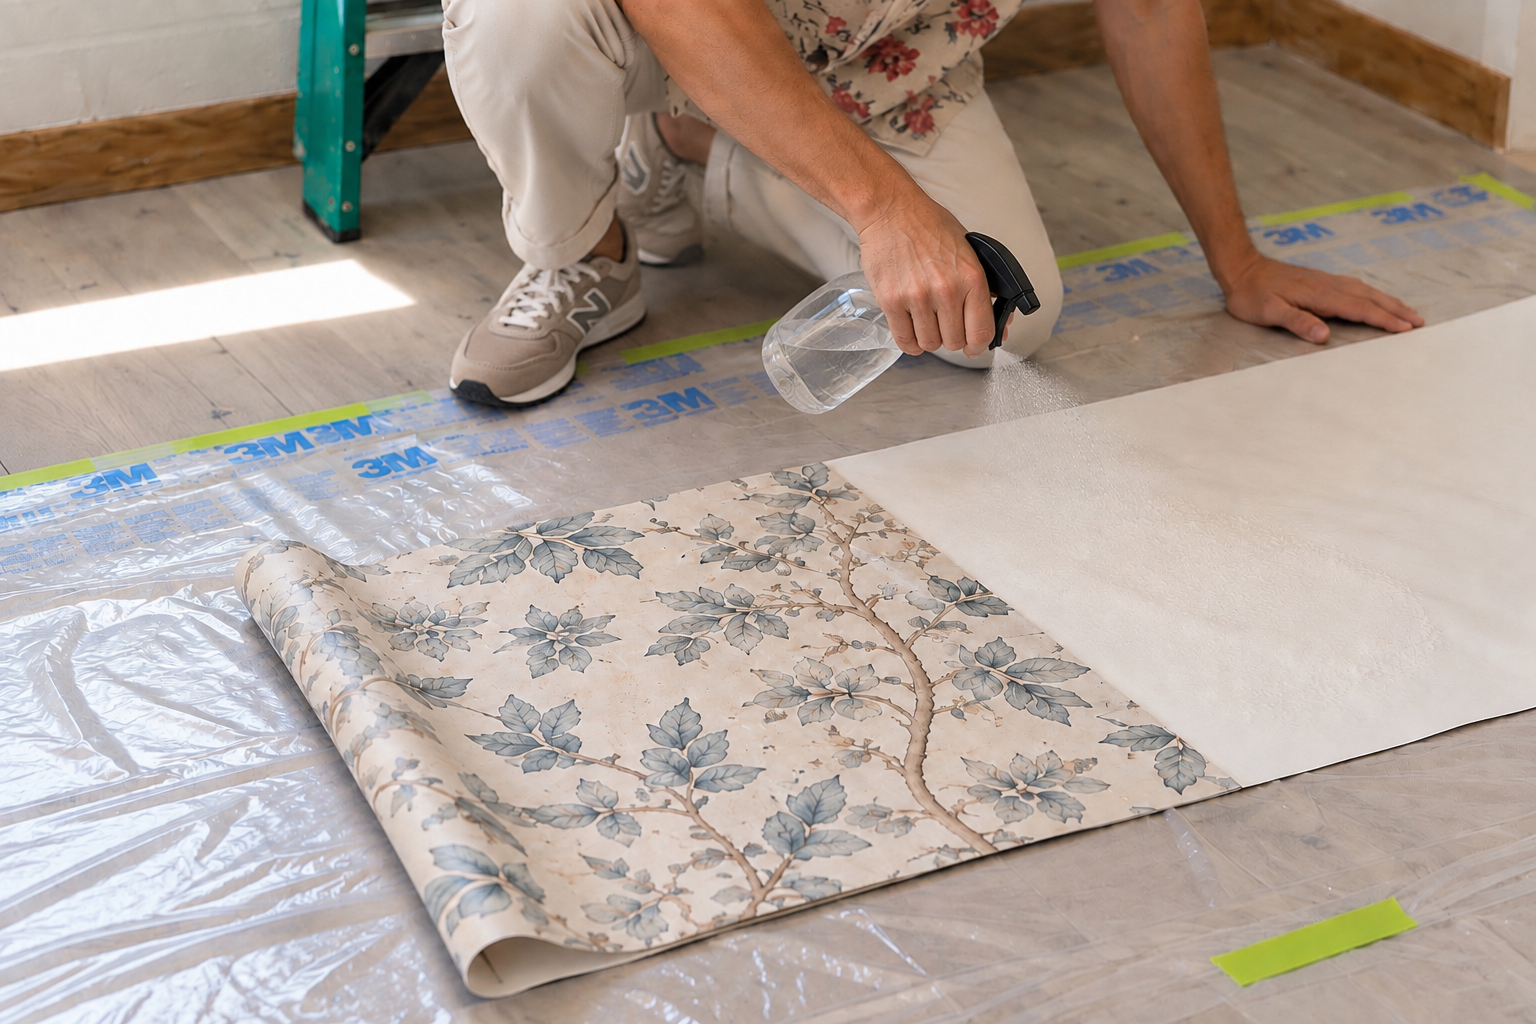
If your wallpaper is designed to be spray activated, evenly spray the entire back with clean water. Pay particular attention to the edges so the pre-applied adhesive activates evenly.
The goal is to wet the entire pasted surface according to the manufacturer's instructions.
Again, this is one of those places where the manufacturer's instructions matter. Some pre-pasted wallpapers are activated with a spray bottle, while others may call for a water tray or another method.
Step 6: Book Your Wallpaper
If you're new to wallpaper, you're probably going to come across the term "booking."
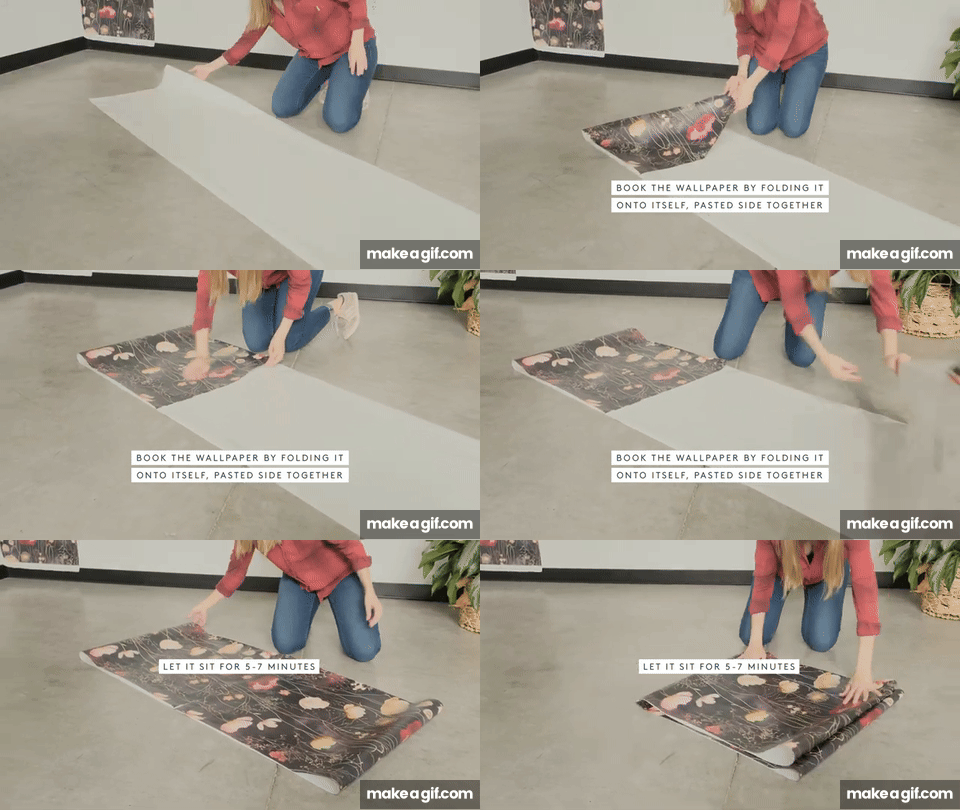
It sounds much more complicated than it is.
Once you've activated the adhesive, gently fold the wet, pasted sides of the wallpaper toward each other so the adhesive sides are touching.
Don't crease the folds.
Then let the wallpaper rest for the amount of time specified by the manufacturer.
This gives the adhesive time to fully activate and allows the paper to relax before you put it on the wall.
Step 7: Hang Your First Drop
Now for the important part.
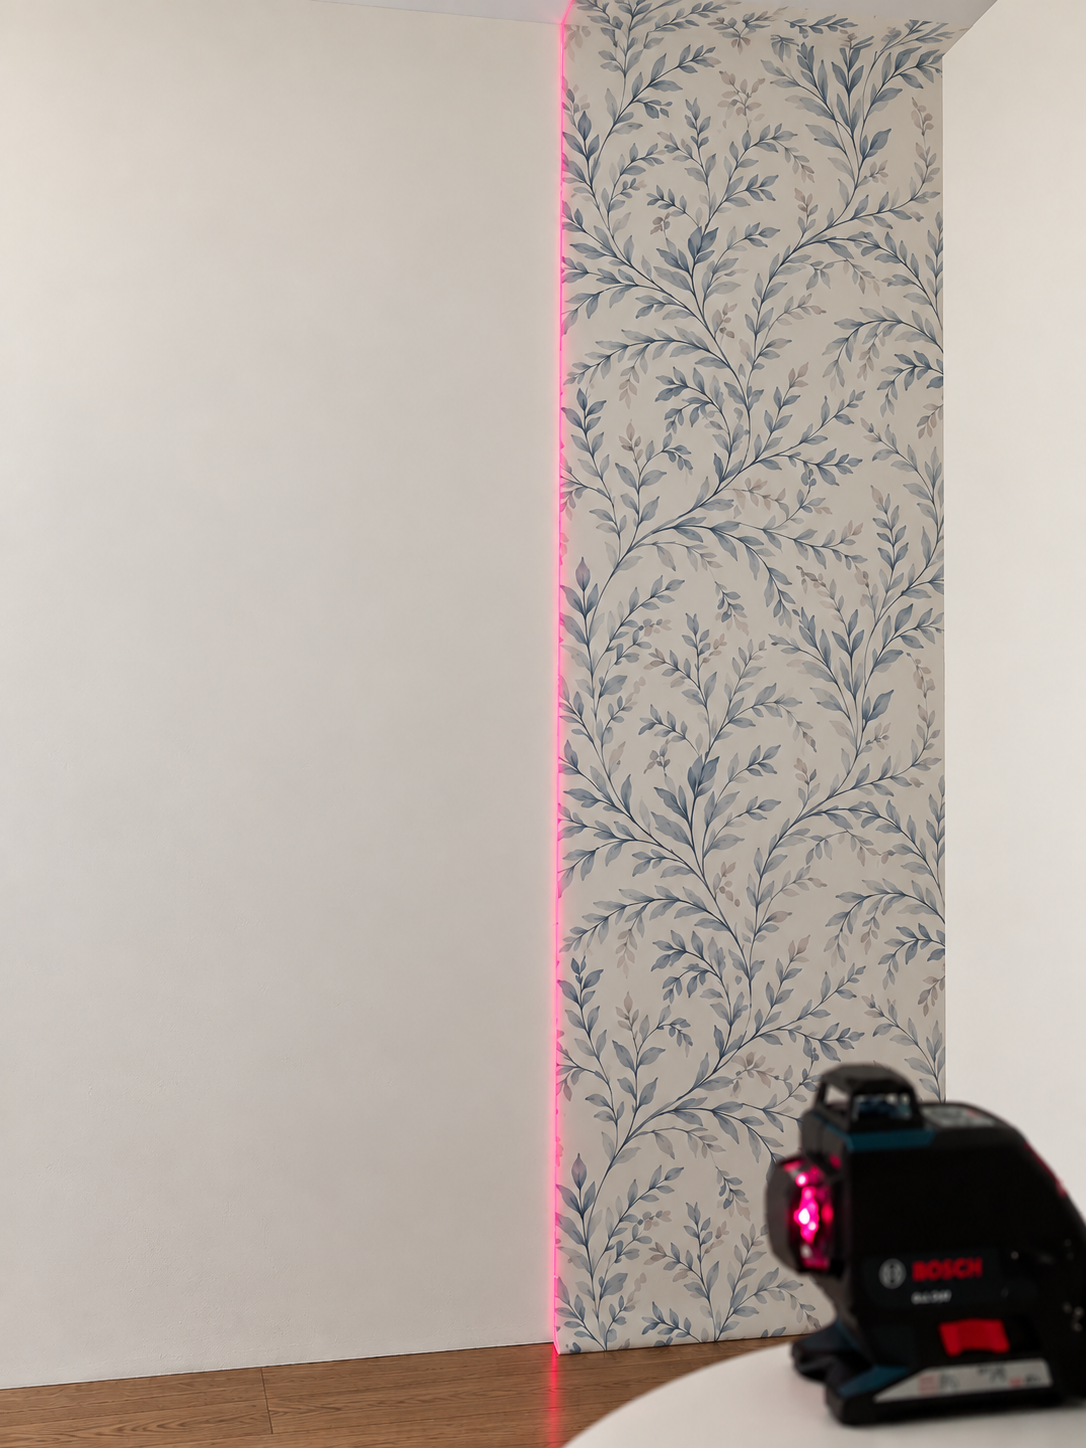
Unfold the upper portion of your booked wallpaper and bring it to the wall. Position the paper so approximately two inches extend above the ceiling line. Then align the edge of the wallpaper with the plumb line you created earlier. Don't worry about trimming the top yet. And this is exactly why I love pre-pasted wallpaper for DIY.
You can move it.
While the adhesive is wet, you have some flexibility. You can gently slide the paper left or right. You can adjust the height. You can make small corrections until that edge follows your plumb line. Take your time here. The first drop is the one I want you to obsess over.
Step 8: Smooth It
Once you're happy with the position, use your wallpaper smoothing tool to gently smooth the wallpaper from the center outward toward the edges.
You're helping move excess moisture and air toward the outside instead of trapping it underneath the wallpaper.
You don't need to attack it.
Wet wallpaper can stretch. Don't aggressively pull, push, or overwork the material.
Get it where you want it, smooth it down, and then let it be.
Step 9: Trim the Top and Bottom
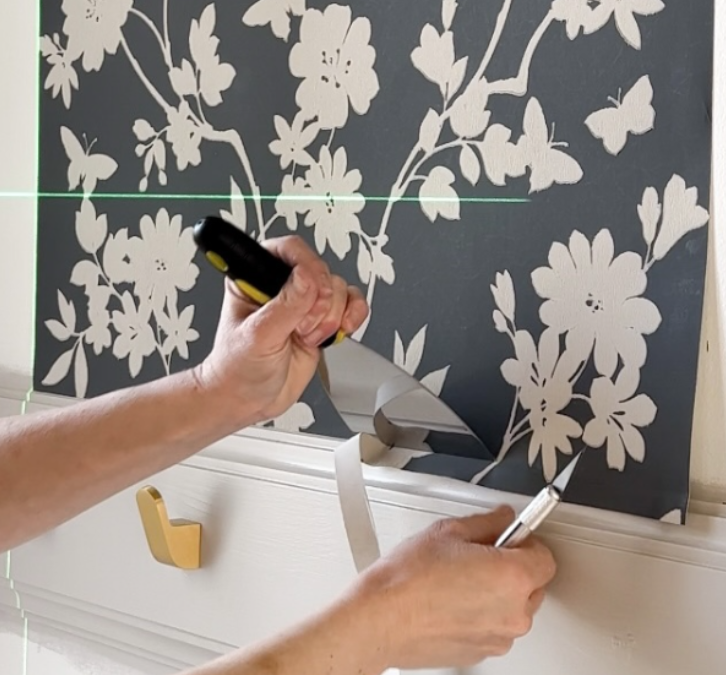
Once the wallpaper is positioned and smoothed, use your straightedge to gently press the paper into the ceiling line.
Then use your X-Acto knife with a fresh blade to trim away the excess. Repeat the process along the baseboard.
And here's where I'm going to repeat myself:
If your blade starts dragging, change it.
Wet wallpaper tears easily. X-Acto blades are inexpensive. Your wallpaper probably isn't.
Step 10: Hang Your Second Drop
Now you'll start to see the design come together. Measure and cut your second drop, taking your pattern repeat and match type into account. Activate the adhesive, book the paper according to the manufacturer's instructions, and bring it to the wall. This time, you're going to use your first drop and the wallpaper pattern as your guide. Position the new strip next to the first one. For most wallpapers, you want the edges to butt up against one another without overlapping, unless the manufacturer specifically instructs otherwise. Now look at the pattern.
Find the point where the design on your second drop connects with the design on your first. Then slide the wet wallpaper until everything lines up. This is where pre-pasted wallpaper really earns its keep for me. You have time to adjust. Once you're happy with the pattern and seam, smooth the wallpaper from the center outward, trim the top and bottom, and move on to your next drop.
Then repeat.
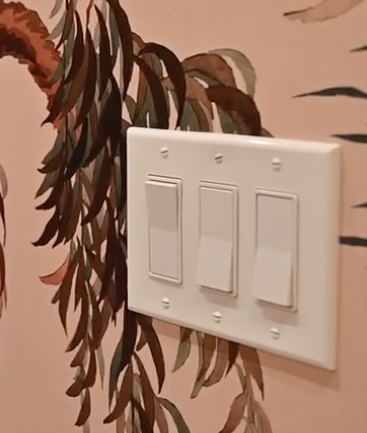
Working Around Outlets and Switches
Don't try to perfectly pre-cut your wallpaper around every outlet and switch. First, turn off the power at the breaker and remove the cover plate.
Hang the wallpaper over the opening. Then carefully locate the opening underneath and use your X-Acto knife to cut away only the wallpaper needed to expose it. When the cover plate goes back on, it should conceal the edges of your cut and give you a much cleaner finished result. There’s a really helpful tiktok showing a cool approach to this here.
Clean As You Go
Keep a clean, damp sponge or cloth nearby while you work. If you get adhesive on the face of a washable wallpaper, gently wipe it away while it's still wet, following the manufacturer's care instructions. Don't scrub. Also clean excess adhesive from your ceiling, trim, baseboards, and nearby surfaces as you work. It's much easier to deal with wet adhesive than dried adhesive the next morning.
And Then... Leave It Alone
This might be harder than it sounds. Once you've finished, your wallpaper needs time to dry. Keep the room well ventilated with good airflow and resist the temptation to touch every little spot that doesn't immediately look perfect. Give the wallpaper and adhesive time to do their thing.
Things That Look Scary But Might Be Fine
You finished your installation, stepped back to admire it and...
There's a bubble.
Don't panic.
Some bubbling or unevenness can appear while wallpaper is drying. That doesn't necessarily mean something went wrong. The same goes for seams. Wallpaper can change slightly in appearance as the paper and adhesive dry. Don't immediately start poking, peeling, pressing, or adding more adhesive while everything is still wet.
Give it time to dry first.
If a bubble remains once the wallpaper has completely dried, you can carefully make a tiny opening with a fine needle and introduce a very small amount of wallpaper repair adhesive underneath. Then gently smooth the area flat. If a small seam lifts after drying, use wallpaper seam adhesive to secure it. And use an adhesive actually designed for wallpaper. Skip the super glue and construction adhesives.
Helpful Video
If you are more of a visual learner, then I would suggest watching this video. Of all of the videos I have watched, this one is the most helpful in my opinion.
When I Would Call a Professional
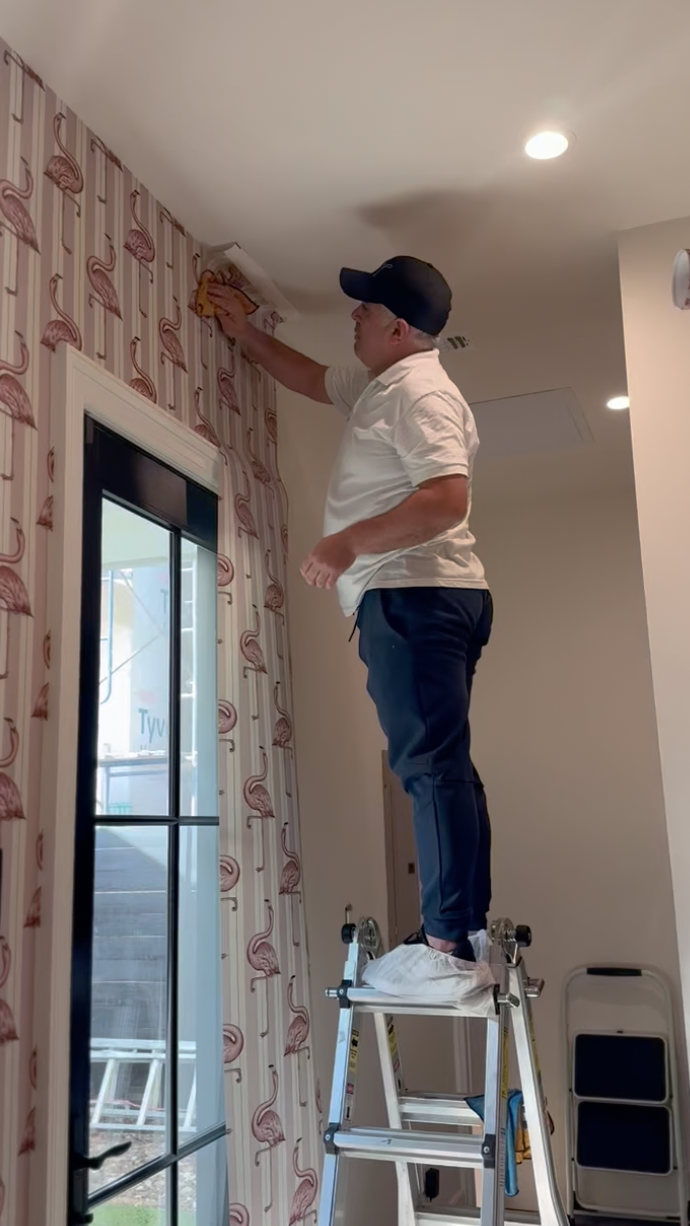
There are absolutely wallpaper projects you can DIY.
There are also projects where I would happily hand the roll to a professional installer.
I would strongly consider professional installation if you're working with:
Grasscloth or other natural wallcoverings
Expensive or hand-printed wallpaper
Large-scale or custom murals
Ceilings
Heavily textured or damaged walls
Stairwells or very tall walls
Complicated rooms with lots of architectural details
There's a big difference between installing pre-pasted wallpaper on a straightforward accent wall and hanging an expensive mural across an entire powder room.
Start with a project that sets you up for success.
And remember: your first drop is everything. Prep your wall. Understand your pattern. Establish a true plumb line. Give yourself those extra two inches at the top and bottom. And take your time getting that first strip exactly where you want it. Once that first drop is right, you have something straight to build from. And that's when the fun part starts.
